Showing posts with label Todd's Tips. Show all posts

Thursday, June 16, 2011

Todd's Thoughts: Web 2.0 and the Redefintion of Everything

Ok, so maybe this should be Todd's Tips, but this is something worth thinking about.

With the wild connectivity supplied to us by Web 2.0 technology forces us to re-define our notions of communication and information. As we link, we link ourselves to other people and ultimately to the Web itself. And, as Professor Michael Wesch of Kansas State University suggests, we link ourselves to the machine; we become the machine. This notion is perhaps a bit buried in the mythology of the Matrix, but it's not very far off.

It's really worth taking a few minutes to watch his video about the way Web2.0 is changing us as sentient beings:

Tuesday, June 14, 2011

Todd's Tips: Best Place for Free Stock Images

Google the term "stock exchange" and the first response that comes up is the New York Stock Exchange. However, the second is NOT the NASDAQ, nor the Nikkei, nor even the London Stock Exchange. It's a website called stock.xchng, the largest free stock photo site on the web. Seriously.

And it really is free. All you need to do is create an account and you're in.

There are nearly 400,000 images available on the site, most of them taken by experienced Pro-Am photographers. The only thing you need to pay attention to the various rights the different artists attach to the images. Most of the time all they want is credit. Not a bad deal for access to a ton of VERY HIGH QUALITY images. Check them out.

Todd's Tips: Stock Footage for Free!

Sometimes there's footage you need that you just can't get.

Suppose you're making a PSA and need a shot of a woman rollerblading near the beach. Or maybe and airplane taking off. Or a horse and buggy riding by.

Well, I have a solution for you: Stock Footage for Free.

Stock Footage for Free is an awesome online repository of stock footage. Their catalog boasts 1,000's of clips and you can download as much as you want for NO COST. None at all.

The only hitch is that you have to register an account. That's free too. So there really is no hitch. Check them out and get the footage you need now.

Wednesday, June 08, 2011

Todd's Tips: External Hard Drive Suddenly Not-Writeable on a Mac?


This is a problem that comes up in the DMS from time to time. Patrons come in and say, "I've been using this external hard drive on a mac for a long time and suddenly it won't work; I can't put files on it." My first question is always the same: "Did you use it on a PC?" They usually shrug and look at the floor, "yes."

This is a problem and it can create some misleading assumptions. Flash drives (thumb drives) can move fairly effortlessly between Mac and PC since they are basically solid-state memory. External hard drives, on the other hand, are an entity unto themselves. As such, they live by different rules.

When a Mac-formatted external hard drive is plugged into a PC, the Windows OS can sometimes attempt to appropriate the drive's file system for its own. Then, when the hard drive is plugged back into a Mac the Mac is unable to write to the disk. There are two solutions to this problem:

1) Prevention - DON'T use your Mac external hard drive on a PC. Just don't. There's a very low chance that your disk will become unwritable if you do this.

2) Cure - If it comes to the point where your Mac-formatted hard drive has become unwritable on a Mac your only option is to reformat the drive. Some folks will tell you that you can "repair the permissions," but this is almost never possible. BEFORE you do this make sure you backup all your data; once you tell a Mac to reformat there's NO WAY to recover any data left on the drive. Here's a video tutorial on how to format an external hard drive on a Mac.

One option you have, if you insist on your drive being useable on both systems, is to partition the drive with some percentage reserved for Mac and some percentage reserved for PC. Here's a video tutorial on how to partition a drive.

If you decide to take this route, make sure that you set the formats as follows:

Mac partition - Mac OS Journaled (extended)
PC partition - NTFS

DO NOT USE Fat32 for any reason. This file system was intended to be a cross-platform solution. Unfortunately it will not allow the transfer of files larger than 4Gb. If you're doing video work or some other heavy multimedia lifting Fat32 will only complicate your life.


Tuesday, June 07, 2011

Todd's Tips: Choosing an External Hard Drive


It seems like choosing an external hard drive would be little more than a question of price. But this is far from the case. There are a number of important considerations one needs to take into account when choosing an external hard drive.

1) Purpose - The answer to "why do I need an external hard drive" is going to drive the rest of the considerations when choosing a drive. If it's just to store your documents and work or school stuff, then you probably don't need a very large or very fast drive. On the other hand if you are planning on using it for media projects you speed and capacity are important things to think about.

2) Capacity - Most external hard drives range from 500 to 2000 Gb these days. The more space you want, the larger and heavier the drive will be.

3) Connection - The choices here are USB and Firewire. USB will work just fine for a PC or casual use on a Mac, but if you intend to do any sort of media work at all you need a Firewire connection. This will make file transfer much faster. Some external hard drives actually come with both Firewire and USB connections. You should know that Firewire connections are much more common on Macs than on PCs.
4) Format - When you buy an external hard drive it will be formatted for either Mac or PC. It is important you purchase a drive with the format of the system you plan to use most often. While, depending on the format, one may work on the other system, problems can and do occur with cross-use. Be warned.


Wednesday, January 12, 2011

Todd's Tips - Visual Hub Should Be Your Facebook Friend

Actually you should really just leap ahead and marry it. It's amazing.

One of the most frustrating things about video work is conversion between one format and another. This typically comes up when you've finished your project. You export it, make a DVD and then someone says, "You should put it on the web/your website/YouTube." And this is when things get hairy.

What do you do when you have a huge Quicktime (.mov) file and you need it to be a small Quicktime file or maybe even an .mp4 or something else for the web? What you do is go to Visual Hub. Check it:

A quick look shows you two things. It's a simple interface and it has a lot of workable formats. You can convert to formats for all types and generations of iPods and other Apple devices. You can convert to .dv, .avi, .mp4, .wmv and even Flash video. And, as you might imagine, you can convert back from all these file formats as well. As such, it's also one of the best converters for moving video out of un-wieldy Windows formats like .wmv and .avi.

Unfortunately VisualHub is no longer available to the general public; the company that built and sold the product has discontinued it. However, the Digital Media Studio has it on all its macs.

So, if you have some video to convert, stop by and let us show you how. Or you can watch this video. And if you can get around the fact that the guy sounds like John Leguizamo, you can actually learn a lot about this awesome program:


Tuesday, January 11, 2011

Todd's Tips: Take Your DVDs to the Next Level

One of the easiest ways to put the movie you've made onto a playable DVD (as opposed to a file saved on a disc) is to use iDVD. Which is admittedly a fine way to make a dvd for class.

But, suppose you want to make a DVD that has your project and your contact info. Suppose it's something you want to submit as part of an internship or job application? What do you do then?

Well, you probably don't want to use iDVD since all you can get there are pre-made themes with music and all other kinds of stuff you can't get rid of...

There is an alternative: DVD Studio Pro. Here are some tutorials to get you started...


Thursday, November 18, 2010

Todd's Tips - Learn HTML and CSS. Now!

Kind of a sad state of affairs, no? I think one thing we can take away from this image is the idea that there are so many WYSIWYG applications out there that actually writing HTML code has become a sort of lost art.

But it shouldn't be.

HMTL (Hypertext Markup Language) and its companion CSS (Cascading Style Sheet) are essential for creating high-quality websites. While the WYSIWYG (What You See Is What You Get) applications like Dreamweaver and Front Page can take you a long way, when you really need to alter the page in a minute way to fit your awesome idea, you're gonna need HTML and CSS.

Let me explain...

A web browser, like the one you're using now to read this, is built to read HMTL. At least, that was the original idea. HTML allows you to upload text (Hypertext) to the net. In the beginning one could only do the bare minimum of formatting with barebones HTML. But, after a while, CSS came along. CSS is a scripting language that acts on HMTL elements in a page. It can add a number of attributes such as color, size and most importantly positioning. Moreover, it can also be used to position Java Script objects, Flash files and other, more interactive elements. So as of right now the basic developmental elements of a web page are its HMTL base and a linked CSS file that tells all those HTML elements where to go.

So, in order for you to create the best web pages you can, you need to learn these things. And here's where you can start:


More Basic HTML Tutorials - This website might look crappy, but that's because it uses no CSS. Despite this, you'll find that the tutorials are very good at explaining the basics of HTML.


Also, there are a large number of tutorials on HTML and CSS as well as other web-scripting languages such as Action Script, Java Script, PHP, Ajax and Cold Fusion on Lynda.com.

Tuesday, November 09, 2010

Todd's Tips - Learn to Shoot Good Video

Have you ever felt like this when you finish a video? Felt like you're carrying the corpse of your dead idea?

Editing can obviously be a big part of making a good video, but before you ever even get to the editing suite, there's a lot
you can do to make your video amazing. You can shoot it well.

Now, for non-film students this might seem like a daunting challenge; without access to high-end video cameras or fancy lighting equipment high-quality shooting seems like a pipe dream. But it doesn't have to be. Here are a few simple tips for shooting good quality video for your class projects with an emphasis on shooting interviews.

These tips are perfect for the Flip UltraHD and Kodak Zi-8 camcorders we have available in Media Services.

1) Use a Tripod. For serious. Nothing detracts from video like shakiness that shouldn't be there. Don't have one? No problem. You can always prop the camcorder on something. The goal here is steadiness.

2) Pay attention to your framing. Framing is the process of moving the camera (or subject) such that the subject is positioned in a dynamic, appealing way. What does that mean? It means using the "rule of thirds."

Basically the rule of thirds splits the frame into three sets of horizontal spaces and three sets of vertical spaces. Where these thirds meet might be considered sweet spots. Like this:

Also notice here that this fellow is facing toward the part of the frame in which there is MORE space. This is called "nose-room." Imagine if he were facing to the right instead? He would look seriously jammed against the side.

Finally, see how the top of his head is cut off a bit by the top of the frame. That's called "head-room." It's generally ok to cut off the top bit or let a subject's head have a touch of space between it and top of the frame. Go lower than that and it'll look like the poor fellow is about to fall out of the bottom of the frame.

So when you set up your shot, take your time and make sure it looks appealing.

3) Light Your Subject. Even if you just tilt the shade of a lamp a bit to brighten up your subject's face, do so.

Or you could use a reflector to reflect some local ambient light onto your subject. And this is as simple as stretching some aluminum foil over some cardboard. Like the one to the left.

Believe me, it makes a huge difference. But lighting is a huge subject in itself. So checkout Videomaker magazine's website. They have a massive repository of educational articles and videos. Here are the ones on lighting.

4) Finally, and perhaps most important, test your gear before you get to your shoot. Make sure it works and you know how to work it.

Here's the link to the main teaching section of Videomaker's website. There are sections on pre-production, production and post-production. All are worth spending a bit of time on, even if you are only doing a short piece for your Anthropology class.

Todd's Tips - iTunes: Learn Anything, the Digital Way

I think it's time we take a slight digression from media-related posts and take a broader view of the world.

When I was last applying for jobs I was asked in an interview how I learned so many programming languages. (I am fluent in Action Script 3.0, Java, C, C++, Objective C, Python, PHP, HTML, CSS and XML). The answer is iTunes. Between podcasts and iTunes U a body can learn anything and everything on iTunes. There are literally millions of educational podcasts and free courses from a vast range of universities.

Here are just a few examples (click on the links to open iTunes right to the courses):

Don't have iTunes, don't worry. Download it here for free.

A full course from Stanford's Department of Computer Science on Development for the iPhone.

A set of all the tutorials you'll ever need for iMovie HD from the University of Houston. Btw, iMovie HD is the version that we in Media Services recommend non-media students use.

A podcast with more than 40 episodes on how to program in Action Script, Flash's Object Oriented programming language used to add interactivity to your Flash projects.

But it's not just media stuff you can find on iTunes. Just about everything else too...

A full course from Yale university on Ancient Greek History.

A full course from UC Berkeley on General Anatomy.

A full course on single-variable calculus from MIT.

There is almost nothing you cannot learn from iTunes. Just navigate to the iTunes store and type in your search terms. Scroll down on the results page to find iTunes U and Podcasts. Take advantage of it because the best part is, it's free!


Tuesday, October 26, 2010

Todd's Tips - Color Palettes for Your Graphics Projects

When I'm doing graphics one of the things I find most difficult is choosing a proper color palate.

And that's where this site (ColourLovers) comes in. The site has over 1 million color palates online and they are searchable by matching colors, theme, mood, even season or trend.

If you need a good palate, this is a one stop shop. I highly recommend checking out ColourLovers.

Todd's Tips - Best Free Stock Photo Site Ever

One of the most difficult things about professional media production can be obtaining good quality images for your work.

Stock.xchng is one of the best places to get free stock photos. And, the vast majority of the nearly 400,000 free photos is that they come with wide open usage licenses. Most only require photographer credit.

All you have to do to start downloading free photos (and even some vector graphics) is create an account. It's free and they don't send you a bunch of silly email. Just fill out the form and your off and downloading.

So if you need images, this is the place.

Saturday, October 09, 2010

Todd's Tips - Best Video Formats for FCP + Visual Hub

Have you ever imported anything into Final Cut Pro, dragged it to the timeline and then found that it doesn't playback? Perhaps you find an angry red line on top of your timeline, like this:

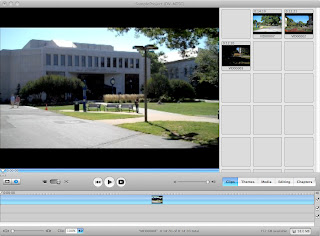
Yeah, this is undoubtedly annoying. But the problem is not with Final Cut, at least not directly. While FCP is a vast program full of options, it can be picky about some things. One of those things is the video format you import into it.

When capturing directly from a camera you rarely come across that problem, but when importing pre-digitized footage, from a FlipCam or some other device, it comes up with alarming frequency.
When importing from a device, the video typically comes in one of three major formats: .mp4, .mov and .avi. While it might make sense that at least a .mov would work properly in FCP without rendering, it's an Apple format after all, this is not always the case. The best way to ensure that your video works in FCP is to convert it to the most friendly video format for FCP: .dv.

Fortunately, we have a program in Media Services that will do this for you with no hassle. Visual Hub is a now defunct video converter Media Services managed to acquire.
All you need to do is select DV from the top bar, drag your video clips into the space below, check the "Ready for Final Cut" box and click "Start." It's that simple.

One thing to note though, .dv files are fairly un-compressed video so the resulting files may be large. Make sure you have plenty of storage space on hand.


This video will show you how to use Visual Hub to convert video for FCP.

Wednesday, October 06, 2010

Todd's Tips - About Web Hosting and a Recommendation

**This recommendation comes strictly from Todd, based on his personal experiences with the hosting company noted below, and is in no way a paid promotion or advertisement.**

There are a lot of web hosting companies out there on the web...

Maybe I'm getting ahead of myself. Perhaps you'd like to know what web hosting is first before we discuss who does it well?

Every website you see on the net, including this blog, is hosted on a server, somewhere in the world. A server is basically a big computer that does two things, it receives requests and doles out data. When you type in a web address and hit return, what are doing is essentially placing a "call" to the server and asking it for the information that should be displayed on a particular web page. Your web browser (Firefox, Safari, Internet Explorer, etc...) then translates the code it gets back into a coherent "page." That's what you see when you bring up this blog.

So, to have your own website, you need to have a server. Now, you could purchase a server and some server software and setup your own, but this takes expertise and is therefore best left to the experts. That said, you'll need to pay someone else to host your site.

And to come back to where I started, there are a number of web hosting companies out there on the web. But, before I make a specific recommendation, let me give you a few things to think about when shopping for web hosting:

Cost, obviously. Most companies range between 5 and 12 dollars per month, depending on how many bells and whistles you get.

Storage space. Typically most standard hosting plans will provide you enough storage space for all your pages. The only issue is if you are planning to have a lot of multimedia on your site (videos and the like). If so, you may consider paying for more space.

Bandwidth. This is how much data you can transfer per month. Again, unless you are doing a lot of multimedia then you're probably ok with the standard plan.

Databases. If you are planning on hosting a CMS (Content Management System) like Drupal or Joomla, you WILL need some databases. Most standard plans now allow 10 to 50 databases on a standard plan, but you'll need to make sure.

Tech Support. Unless you are a master, things will go wrong on your site and you will not know how to fix them. Make sure the plan you get has tech support, free if possible...

My personal recommendation for web hosting is a company called Bluehost. Their prices are about average for the market, they offer large storage and bandwidth options as well as 50 databases on most plans. Their tech support folks are awesome. And free. I have hosted two sites on Bluehost and both were based on a Drupal CMS; I had no problems with installation or usage of either site. These are good folks.

But, there are a few other worthwhile competitors to Bluehost where I know colleagues have successfully hosted sites. They are:

Tuesday, September 28, 2010

Todd's Tips - Easy Video Importation into iDVD

While iDVD is one of the simplest DVD creation programs out there, sometimes it can throw folks for a loop.  

Say for example, you had a video that you made and it's lingering in some folder somewhere.  You open up iDVD, find a template and then what?  Now, you can use the "Import" command from the File menu, but there's an even easier way to do it.

Now, say your video's file name is "myRadVideo.mov"

It's as simple as dragging the video from its folder into the iDVD theme.  Now, here's the tricky part.  Most of the iDVD themes have "Drop Zones" on them, delineated by a black and yellow caution-style border.  DO NOT put the video there.  That will simply make it part of the theme.  Instead, drag and drop the file somewhere else on the theme.  You'll know you've done it right when the file name appears on the screen.  

One last thing to do.  Select that file name and type the word "Play."  This will appear on the screen when the DVD is played as a clickable button.  You can leave the original file name, but DVD convention dictates that people are looking for that "Play" button and not some odd file name.  Don't want to give your professor any reason to not be able to watch your video.

Saturday, September 18, 2010

Todd's Tips - Extracting Audio in iMovie

Let's say, for example, you have to do a project about campus. You get a FlipCam from Media Services and you shoot some video. You record some voice-over and you're ready to put your video together. But, when you look over your footage you find that the audio from the footage you shot of campus is filled with sirens and the other sounds of city traffic. Problem.

One way you could handle this to simply turn down the sound

on the video clip. But, you could also remove the audio from the video clip entirely (and even replace it with something else, like your voice-over or music).

To do this in iMovie HD you'll need to be in timeline mode. On the bottom left-hand corner of the program there's a little button with a clock icon.


Once you've clicked on that, the video-building interface on the bottom of iMovie will change to look like this:


Here a blue bar represents your video instead of a small box. Once you have the timeline view up, right click on the video (the blue bar) to bring up a small menu. In that menu select "Extract Audio," as seen here:


Finally, once you select "Extract Audio" the clip will split with the blue bar (your video) above and a purple bar (when selected) with darker purple waveforms below (your audio).

The audio and video tracks may now be moved independently of each other. You can also delete one or the other by selecting one and hitting the "Delete" key. You can also cut the audio clips just like you cut video (by hitting "Apple T")

Be mindful though, if you begin playing with your audio track you can move audio out of synch with video which can be a real problem if your video is of someone speaking.

Friday, August 13, 2010

Todd's Tips - See Audio Waveforms in the Final Cut Pro Timeline

Often times when editing you want to see the audio waveforms in the audio tracks (as pictured to the right). This can allow an editor to more easily edit to audio and is particularly useful when creating music videos.
Final Cut Pro's default setup is NOT to show these waveforms on the audio tracks. However, setting it so that it does is a very simple process, though finding the proper place to change the setting can be a bit hairy. But, if you follow these simple steps, you'll have no problem in making this change:

**Please note that these changes will only take effect in NEW sequences of the timeline. Therefore, after you make the changes, you will need to create a new sequence from the File menu. As such, this procedure is best done BEFORE you begin editing.**

1) Once Final Cut Pro is open, go to and click on the "Final Cut Pro" menu; it's the one to the right of the apple and to the left of the "File" menu.

2) Select the "User Preferences" menu item.

3) Select the "Timeline Options" tab.

4) On the left-hand side of the panel there is an area designated "Track Display."

5) In the track display area, find the check-box for "Show Audio Waveforms" and check it.

6) Click the "Ok" button on the bottom right-hand side of the panel.

7) Create a new sequence from the "File" menu and when you add media that has audio you will see the waveforms displayed on the green audio tracks.